INTRO:
A slip clutch is a mechanical device used in PTO machines to protect components from damage caused by excessive torque or overload. The slip clutch mechanism absorbs sudden shocks or jams without causing damage to the tractor or attachment by allowing controlled slippage between two rotating elements.
There are several reasons why you may need to adjust your clutch, so below is a helpful guide!
Factory Settings:
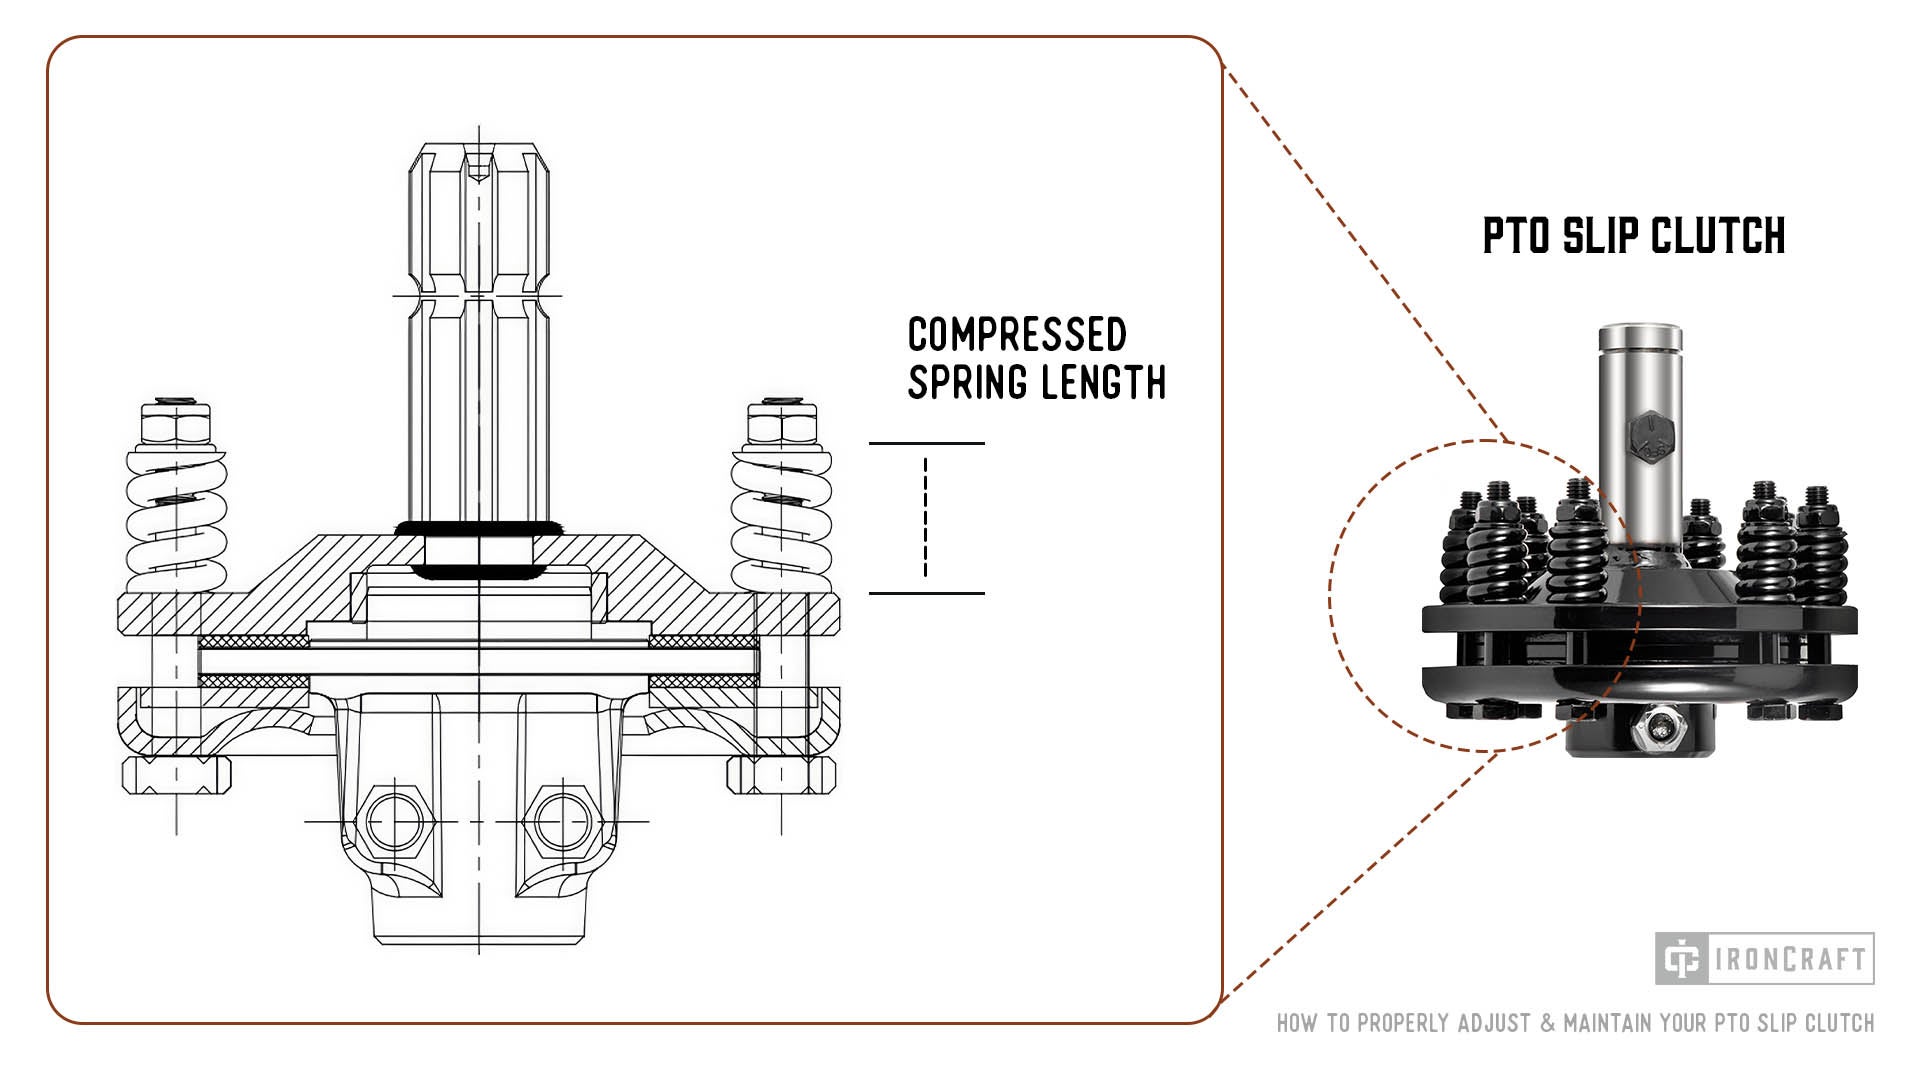
When delivered from the factory, friction clutches are normally set to their rated torque settings. This is achieved by tensioning the clutch springs to their maximum recommended compression. Compressing the springs further will cause damage to the clutch.
EXAMPLE: 7mm diameter springs. Max compressed spring length = 28.5mm 2-plate clutch = 1200 Nm, 4-plate clutch = 1700 Nm. (New series)
EXAMPLE: 6mm diameter springs. Max compressed spring length = 28.5mm 2-plate clutch = 720 Nm, 4-plate clutch = 1300 Nm (Old series)
NOTICE: A compressed spring length greater than 28.5mm is safe while a spring compressed to a length less than 28.5mm is not safe.
In many cases, the clutch will need to be set to suit the specific application being used for. This can be done by following the procedure below.
Slip Clutches Need to be Set if One of the Following Occurs:
- The clutch is new (As clutch application will differ from model/size of machine that it is installed on as well as the job site/soil/cutting debris varies from site to site)
- The clutch has been repaired (including replacing the friction linings).
- The clutch is slipping in work (clutch getting hot, burning out friction linings, machine slowing down in work (i.e.) not cutting/tilling.
- The clutch has been not freed up after a period of storage (see “how to free up the clutch” below).
How to Set the Clutch:
The setting on the clutch is dependent on many variables – the work, the size of the tractor, as well as the size and type of material it is being used on. It is best to set up each clutch individually if possible. The aim is to start with a loose clutch and tighten it up to the exact point where it stops slipping in normal work/use. If set in this way the clutch will slip if any load exceeds this point, protecting both machine and tractor. It is best to set up the clutch with the machine on the tractor and in conditions that approximate the normal workload that the machine does.
The bolts that go through the springs and hold tension on the clutch determine the point at which the clutch slips. These must all be set evenly, either by measuring the spring length or counting the number of turns the nut has been tightened. The clutch must be quite loose initially to ensure it will slip. Slipping should be identified by marking the edge of the clutch and across the outer edge of the linings. (The clutch will always be quite warm during work as the gearbox gets warmed up). Run the machine for a short distance (i.e.) 60 feet under work load and check to see if the clutch slips. Then tighten each tension bolt up 1-turn (more if the clutch was very loose) tighten evenly around the clutch and then run the machine a short distance again. Keep repeating this procedure until the clutch is no longer slipping – it should only take few stops to complete this process.
As you get to the point at which the clutch it is not slipping, tighten the tension bolts a half turn instead of a full turn. Continue to work the machine checking the clutch regularly: you will soon get an idea of how the clutch is performing. You may want to adjust it for varying conditions. If the clutch is too loose it will slip, wearing out the friction discs, get hot and possibly damage the clutch pressure surfaces as well. If the clutch is too tight it will fail to protect the tractor and machine if the machine hits an obstruction (tractor stalls, breakage occurs).
How to Free up The Clutch After a Period of Storage:
As outlined in the instructions on the machine, the slip clutch can seize if left for long periods without use or if stored out in the elements, as water can cause clutch linings to rust and seize as well. The best way to free up a slip clutch is to loosen all the bolts that hold the spring tension on the friction plates (loosen so they are quite loose), then run the machine under heavy work load until the clutch slips. The clutch only needs to be slipped for 30 seconds to a minute to clean up the surfaces. Alternatively, dismantle the clutch and clean it (once cleaned/slippage has begun) then re-assemble and adjust the tension on springs as outlined in the How to Set the Clutch section above.
If you need additional help, our territory managers and dealers are always available to answer any questions you may have!

